
Prerequisites
-
Administrative access to the Windows system.
-
PowerShell installed
-
Access to the source folder you want to snapshot.
- Access to the CAEVES Instance QuickStart, if using the QuickStart
Method 1: Configure a Metadata Snapshot Using the CAEVES Instance QuickStart
Use this method to configure the metadata snapshot schedule through the QuickStart.
Step 1: Open CAEVES Instance QuickStart template
Open CAEVES Instance Quick Start and complete the basic configuration steps. For detailed instructions, refer to CAEVES Quick Start Configuration Guide
Step 2: Configure the Snapshot Schedule
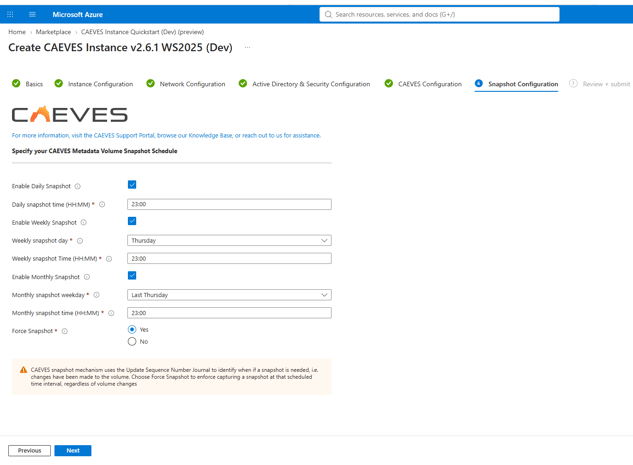
In the Snapshot Configuration section, configure the available settings and select the required scheduling frequency:
- Daily: Run the metadata snapshot every day.
- Weekly: Run the metadata snapshot on selected days of the week.
- Monthly: Run the metadata snapshot according to the selected monthly schedule.
Force Snapshot: By default, CAEVES uses the Update Sequence Number (USN) Journal to detect volume changes and determine whether a snapshot is needed. Enable Force Snapshot to capture a snapshot at each scheduled interval, regardless of whether volume changes have occurred.
Method 2: Create a Metadata Snapshot Using PowerShell and Windows Task Scheduler
Use this method to create a PowerShell script that copies the source folder, generates a metadata file, and runs automatically according to a schedule configured in Windows Task Scheduler.
Step 1: Create the PowerShell Script
1. Open Notepad and paste the following script:
# -----------------------------# File: CreateMetadataSnapshot.ps1# -----------------------------# Source folder$sourcePath = "G:\FCGContainer\testalias" # Update the sourcePath as needed# Destination parent folder$destinationRoot = "C:\MetadataSnapshots"if (-not (Test-Path -Path $destinationRoot)) { New-Item -ItemType Directory -Path $destinationRoot | Out-Null}# Create timestamped snapshot folder$timestamp = Get-Date -Format "yyyy-MM-dd_HH-mm-ss"$snapshotFolder = "$destinationRoot\testalias_snapshot_$timestamp"New-Item -ItemType Directory -Path $snapshotFolder | Out-Null# Copy all data (files + subfolders)Write-Host "Copying full data from: $sourcePath"Write-Host "Destination: $snapshotFolder"# Use robocopy for reliable copy# Log file will be stored in the parent MetadataSnapshots folder$logFile = "$destinationRoot\copy_log_$timestamp.txt"Start-Process robocopy -ArgumentList "`"$sourcePath`" `"$snapshotFolder`" /E /COPYALL /R:1 /W:1 /LOG:`"$logFile`"" -Wait# Create metadata text file in the parent MetadataSnapshots folder$metadataFile = "$destinationRoot\metadata_$timestamp.txt"$files = Get-ChildItem -Path $snapshotFolder -Recurse -File# Write metadata to text file$header = "FullName`tSize(Bytes)`tCreationTime`tLastWriteTime"$header | Out-File -FilePath $metadataFile -Encoding UTF8foreach ($file in $files) { "$($file.FullName)`t$($file.Length)`t$($file.CreationTime)`t$($file.LastWriteTime)" | Out-File -FilePath $metadataFile -Append -Encoding UTF8}Write-Host "Full snapshot (data + metadata) completed!"Write-Host "Snapshot folder: $snapshotFolder"Write-Host "Log file: $logFile"Write-Host "Metadata text file: $metadataFile"
2. Save the file as CreateMetadataSnapshot.ps1 in a folder, e.g., C:\Scripts\.

Step 2: Open Windows Task Scheduler
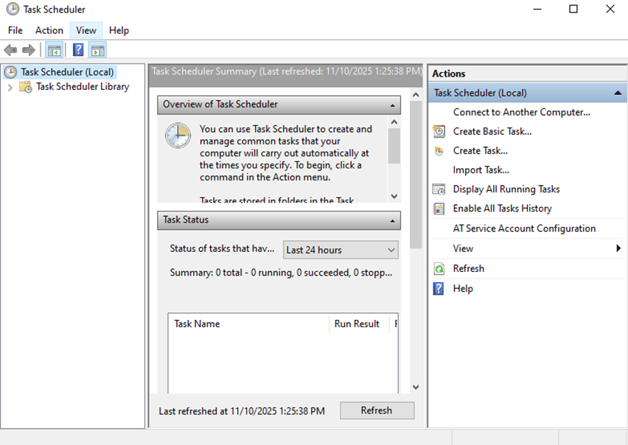
1. Press Windows + S, type Task Scheduler, and open it.
2. In the Actions pane on the right, click Create Task.
Step 3: Configure General Settings
-
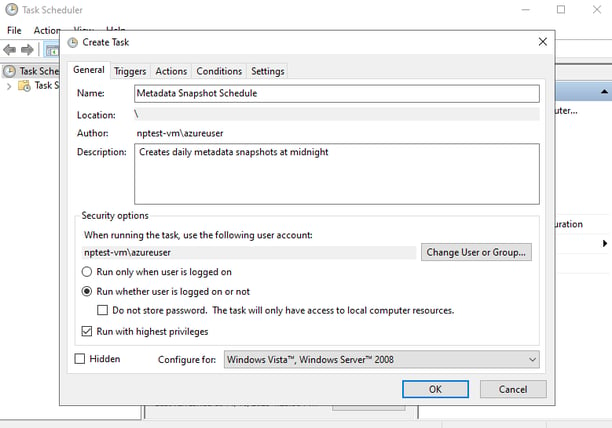
Under the General tab:
-
Enter a name, e.g., Metadata Snapshot Schedule.
-
Optionally, add a description such as “Creates daily metadata snapshots at midnight.”
-
Choose Run whether user is logged on or not.
-
Check Run with highest privileges.
-
Step 4: Set the Trigger
-
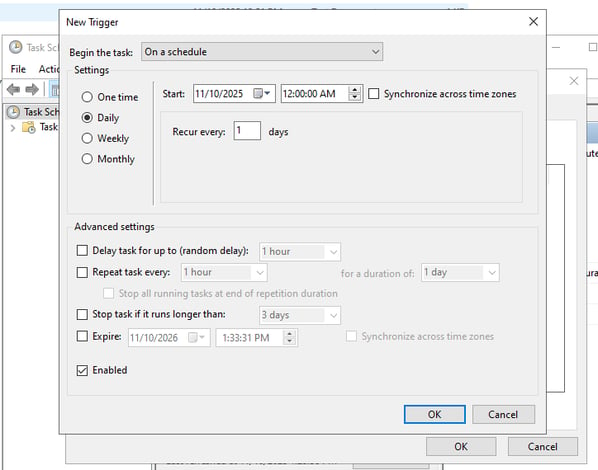
Go to the Triggers tab and click New.
-
Select how often you want to run the snapshot:
-
Daily – runs every day at a set time.
-
Weekly – runs on selected days.
-
-
Set the Start time (for example, 12:00:00 AM).
-
Click OK to save the trigger.
Step 5: Define the Action
-
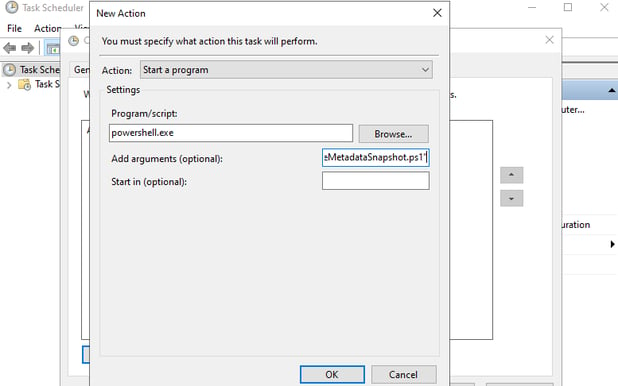
Go to the Actions tab and click New.
-
In the Action dropdown, select Start a program.
-
In the Program/script field, enter:
powershell.exe -
In the Add arguments field, type:
-ExecutionPolicy Bypass -File "C:\Scripts\CreateMetadataSnapshot.ps1" -
Click OK.
Step 6: Save and Test the Task
-
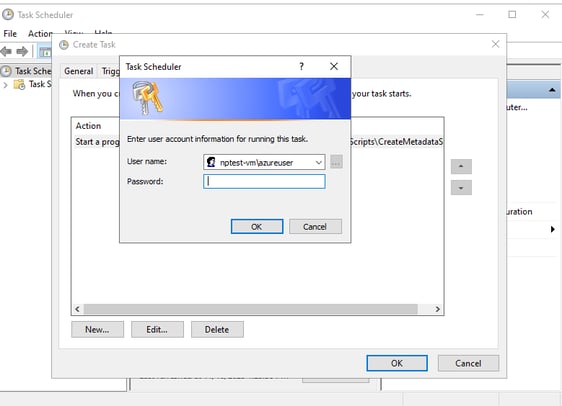
Click OK to save the task.
-
Enter your admin credentials if prompted.
-
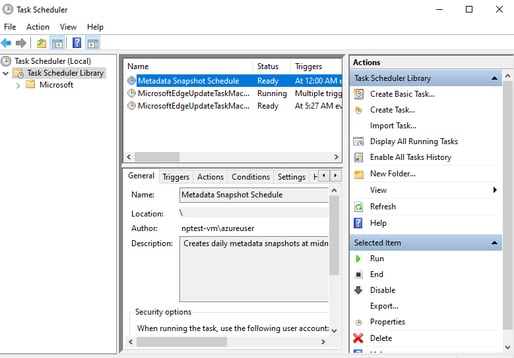
To test it immediately:
-
Right-click the task in Task Scheduler.
-
Select Run.
-
-
Verify that a new metadata snapshot file appears in your destination folder.
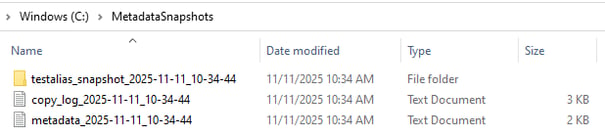
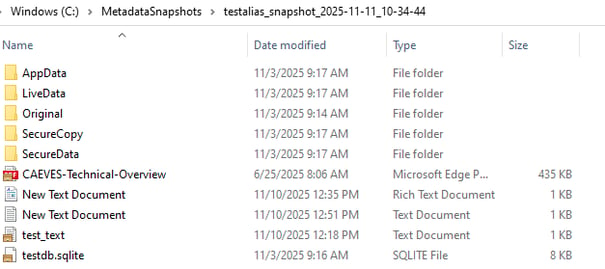
Snapshot folder: testalias_snapshot_2025-11-11_10-34-44
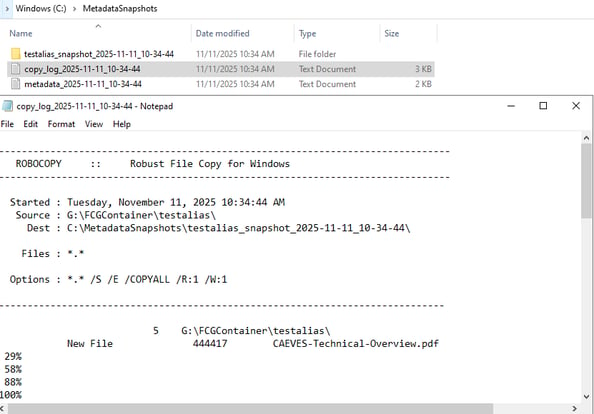
Copy log: copy_log_2025-11-11_10-34-44.txt
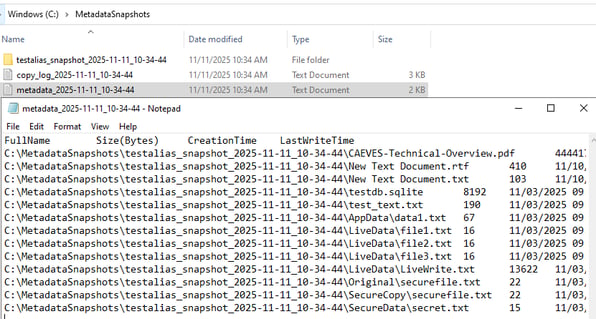
Metadata file: metadata_2025-11-11_10-34-44.txt
The Task Scheduler has been set to run at 12:00 AM daily, so the snapshot will automatically execute at that time without manual intervention.
Step 7: Monitor and Maintain
-
Check the History tab in Task Scheduler for execution logs.
Notes
-
Ensure the source folder path in the script is correct.
-
Robocopy ensures reliable copying, including subfolders and file metadata.
-
Metadata files include: Full path, size in bytes, creation time, and last modified time.