
Prerequisites
-
A valid recovery point exists in the Recovery Services Vault.
-
You have Azure permissions to access the CAEVES instance and vault.
-
The CAEVES instance has sufficient compute and storage resources for the restore.
- The CAEVES instance will be stopped during the restore.
Step-by-Step Procedure
Step 1: Open the Azure Portal
-
Go to https://portal.azure.com.
-
Sign in with your Azure credentials.
Step 2: Navigate to Azure Virtual Machines
-
In the left-hand menu or search bar, select Virtual Machines.
-
Locate and select the CAEVES instance you want to restore.
Step 3: Open the Backup Blade
-
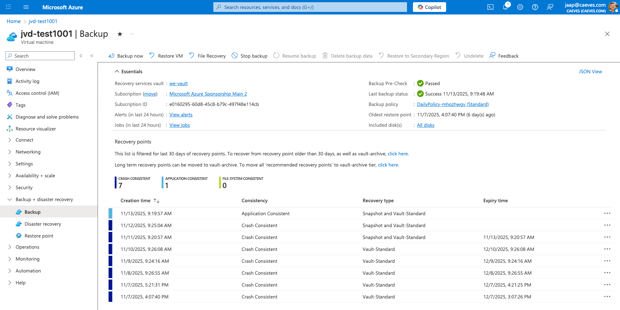
On the CAEVES instance page, open the left-hand menu.
-
Under Backup + disaster recovery, click Backup.
Step 4: Start the Restore Operation
-
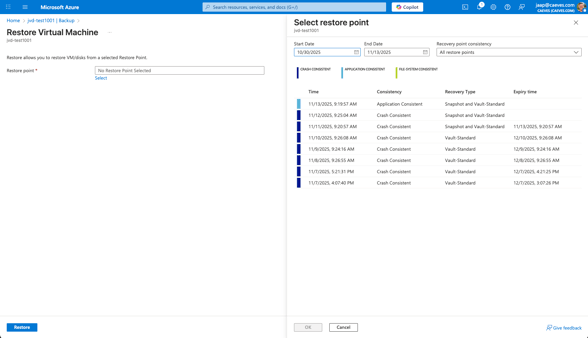
On the Backup pane, click Restore VM
Step 5: Select a Restore Point
-
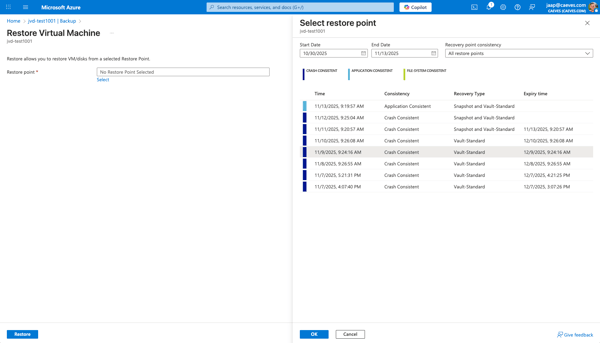
Azure displays all available Recovery Points (snapshots or vault backups).
-
Select the restore point you want to recover from.
-
Click OK.
Step 6: Choose In-Place Restore
-
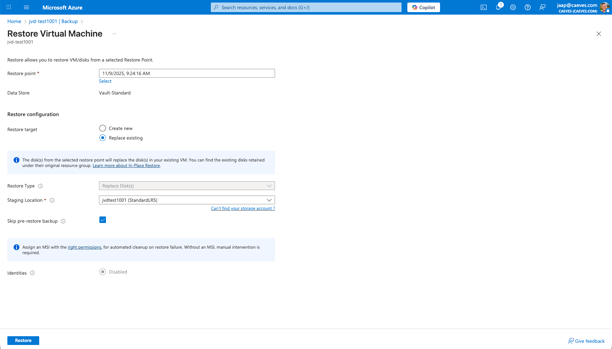
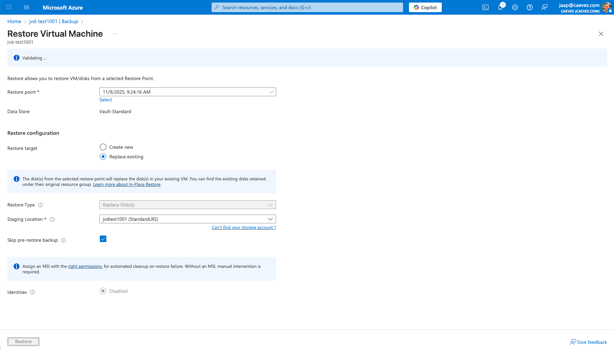
Under Restore Configuration, select Replace existing (In-place restore).
-
Review the warning that the CAEVES instance will be shut down and all changes after the restore point will be lost.
-
Click OK to continue.
Step 7: Confirm Restore Settings
-
Azure displays a summary of the restore configuration:
-
CAEVES instance name
-
Recovery point date/time
-
Disks being restored
-
-
Confirm the details and click Restore to start the operation.
Step 8: Monitor the Restore Job
-
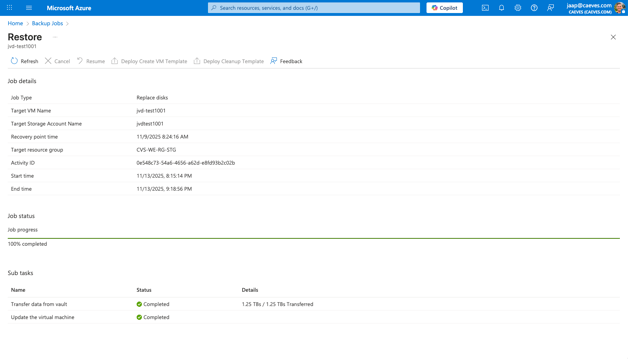
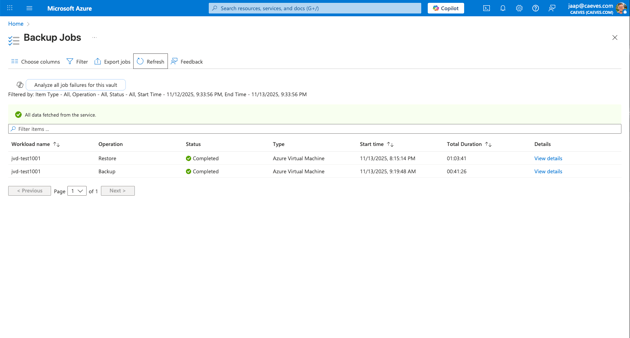
Go to Backup jobs → Restore in the Recovery Services Vault.
-
Wait until the restore job shows Completed.

Step 9: Verify the Restored CAEVES Instance
-
Once the restore completes, start the CAEVES instance.
-
Connect via RDP/SSH.
-
Confirm:
-
CAEVES services are running correctly
-
System modules and application configurations are intact
-
Data integrity is verified
-
Users can log in and access the instance normally
-
You have successfully restored the CAEVES instance in place using Azure Backup