The CAEVES instance is a hardened server appliance that delivers intelligent deep storage capabilities directly into your Azure environment—with no manual setup required.
Prerequisites for Quickstart Deployment
Before launching the CAEVES Quickstart deployment, ensure the following prerequisites are met. Completing these steps in advance prevents deployment failures and permission-related errors.
1. Active Azure Subscription
- You must have an active Microsoft Azure subscription with billing enabled.
- Ensure the account used has Owner or Contributor permissions on the target subscription.
- MicrosoftMarketplace purchases must be enabled for your subscription.
2. Mandatory CAEVES Minimum Requirement Role
2.1 Create the Custom CAEVES Role in Azure
As part of the deployment process, customers must create a custom Azure Role that includes all permissions listed in the CAEVES Minimum Requirement Role specification.
Steps to Create the Custom Role:
- Go to Azure Portal
- On the left menu, select Microsoft Entra ID.
- In the left navigation panel, choose Roles and administrators.
- Click + New custom role (top area).
- choose: Start from JSON
- Click Upload.
- Select the file Json file.
- Click Next through the tabs (Permissions, Assignable scopes, JSON) to review.
- Click Create.
Your CAEVES Minimum Requirement Role is now created.
2.2 Assign the Custom Role to the Deployment Identity
- In Azure Portal, open Subscriptions.
- Select the subscription.
- In the left menu, click Access control (IAM).
- Click + Add → Add role assignment.
- Under Role, search for and select: CAEVES Minimum Requirement Role
- Click Next.
- Click Select members.
- Search for the user or service principal (App Registration).
- Click Review + assign to confirm.
The identity now has the required permissions to deploy.
2.3 Required RBAC Permissions
To successfully deploy, ensure the user or service principal has the following Azure Role-Based Access Control (RBAC) permissions:
"Microsoft.Resources/deployments/validate/action",
"Microsoft.Resources/deployments/write",
"Microsoft.Authorization/roleAssignments/write",
"Microsoft.Resources/subscriptions/resourceGroups/read",
"Microsoft.Resources/subscriptions/resourceGroups/write",
"Microsoft.SaaS/resources/read",
"Microsoft.Storage/storageAccounts/listkeys/action",
"Microsoft.Storage/storageAccounts/read",
"Microsoft.Compute/virtualMachines/extensions/write",
"Microsoft.Compute/virtualMachines/write",
"Microsoft.Storage/storageAccounts/write",
"Microsoft.Network/publicIPAddresses/write",
"Microsoft.Network/networkInterfaces/write",
"Microsoft.Network/networkSecurityGroups/write",
"Microsoft.Network/virtualNetworks/write",
"Microsoft.Storage/storageAccounts/blobServices/write",
"Microsoft.Storage/storageAccounts/blobServices/containers/write",
"Microsoft.Storage/storageAccounts/tableServices/write",
"Microsoft.Storage/storageAccounts/tableServices/tables/write",
"Microsoft.Resources/deployments/read",
"Microsoft.Resources/deployments/operations/read",
"Microsoft.Resources/deployments/operationstatuses/read",
"Microsoft.Network/networkSecurityGroups/read",
"Microsoft.Network/publicIPAddresses/read",
"Microsoft.Network/virtualNetworks/read",
"Microsoft.Network/networkSecurityGroups/join/action",
"Microsoft.Network/networkInterfaces/read",
"Microsoft.Network/networkInterfaces/delete",
"Microsoft.Network/virtualNetworks/subnets/join/action",
"Microsoft.Network/applicationSecurityGroups/read",
"Microsoft.Network/publicIPAddresses/join/action",
"Microsoft.Network/networkInterfaces/join/action",
"Microsoft.Compute/disks/read",
"Microsoft.Compute/disks/beginGetAccess/action",
"Microsoft.Compute/virtualMachines/start/action",
"Microsoft.Compute/virtualMachines/runCommand/action",
"Microsoft.Compute/virtualMachines/extensions/read",
"Microsoft.Compute/virtualMachines/read",
"Microsoft.Compute/virtualMachines/deallocate/action",
"Microsoft.Compute/virtualMachines/restart/action",
"Microsoft.Compute/virtualMachines/delete",
"Microsoft.Network/virtualNetworks/subnets/read",
"Microsoft.Compute/disks/write",
"Microsoft.Compute/disks/delete",
"Microsoft.Compute/disks/endGetAccess/action"
3. Azure CLI, PowerShell, or Portal Access
Depending on your chosen deployment method:
- Azure Portal: Access to Azure Portal with sign-in credentials.
- Azure CLI: Installed and configured locally.
- Download the installer:
https://aka.ms/installazurecliwindows
- Run the installer:
Double-click the downloaded .msi file.
Follow the installation wizard.
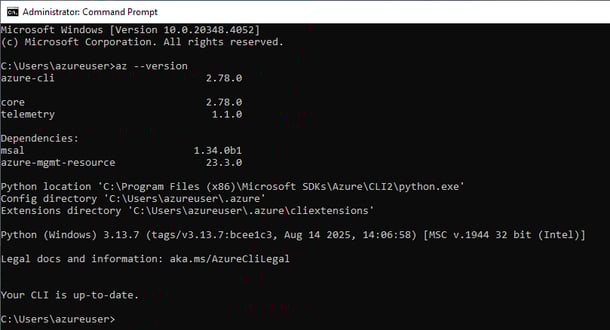
- Verify installation:
Open Command Prompt and run: az --version
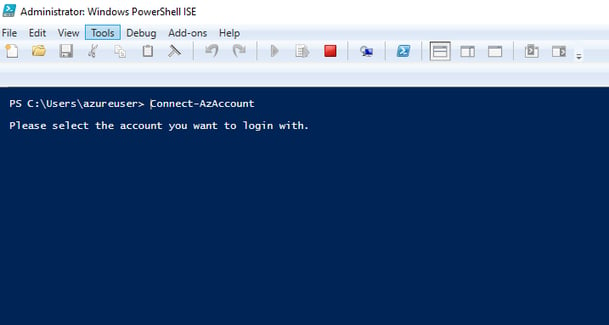
- Azure PowerShell: Installed and connected via Connect-AzAccount
4. Registered Azure Resource Providers
Ensure the following resource providers are registered:
- Microsoft.Compute
- Microsoft.Network
- Microsoft.Storage
- Microsoft.KeyVault
Register using Azure CLI:
- az provider register --namespace Microsoft.Compute
- az provider register --namespace Microsoft.Network
- az provider register --namespace Microsoft.Storage
- az provider register --namespace Microsoft.KeyVault
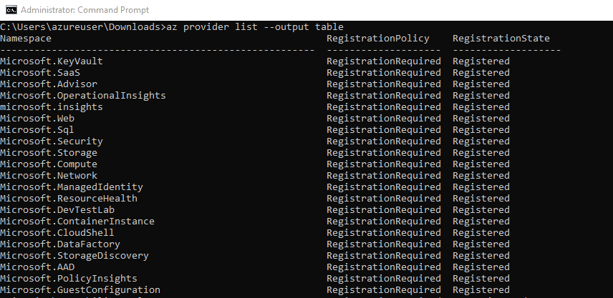
To verify registration:
az provider list --output table
You may also register providers via Azure Portal → Subscriptions → Resource providers.
Register Using the Azure Portal:
You can also register resource providers through the Azure Portal:
- Sign in to the Azure Portal: Azure Portal
- Navigate to Subscriptions.
- Select the subscription you will use for the deployment.
- In the left-hand menu, select Resource providers.
- Use the search bar to find the required providers, such as:
Microsoft.ComputeMicrosoft.NetworkMicrosoft.StorageMicrosoft.KeyVault - Select each provider and click Register.
- Wait for the status to display Registered.

5. Azure Active Directory (Entra ID) Configuration
- Ensure your Azure AD tenant is properly configured.
- The user subscribing must belong to the same Azure AD tenant as the Azure subscription.
- If your SaaS solution uses service principals or managed identities, verify they have the necessary role assignments.
6. Network and Resource Availability
-
Confirm any required network resources (VNet, subnets, public IPs) exist or will be created.
-
Ensure quotas (e.g., VM cores, storage accounts) are available in the target region.
7. Template Parameters and Resource Naming
Review the Quickstart template to identify required parameters such as:
-
Admin username/password or SSH key
-
Region and resource group name
-
App-specific settings (e.g., VM size)
Validate all parameters such as region, VM size, and naming conventions before deployment.
Once all prerequisites are met, you are ready to deploy the CAEVES Quickstart.
Provisioning Your CAEVES Instance in Microsoft Azure
What is the CAEVES Instance?
-
A virtual machine with CAEVES software preinstalled
-
Acts as both a deep storage interface and a data migration engine
-
Supports multi-protocol file sharing (SMB & NFS)
-
Preserves NTFS permissions & ACLs via Active Directory or Entra ID
-
Enables real-time caching, intelligent data tiering, and snapshotting
-
Perfect for hybrid and public Microsoft Azure datacenters
Step-by-Step: Provisioning via Microsoft Marketplace
Step 1: Launch the Quickstart Deployment
-
Navigate to Microsoft Marketplace - CAEVES Quickstart Application
-
Review the Getting Started instructions
-
Click Create
Step 2: Basic Setup
-
Select your Azure Subscription, Resource Group, and Region
-
Deploy near your data & AI workloads to minimize latency
-
Associate your previously created CAEVES subscription
Step 3: Configure the Virtual Machine
-
Name your CAEVES VM instance
-
Choose a VM size (we pre-select the recommended size)
- Configure Data Disks:
The CAEVES instance uses two disks:
For Example:
Fixed Disk (LUN 0, 1024GB)
Metadata(F:) - 10% of disk = 102.4GB
Snapshots(unlabelled) - 90% of disk = 920.7GB
Slider Disk (LUN 1, 512GB)
Cache (G:) - 100% of disk = 512GB - These allocations follow the percentage rules (10%, 40%, 50%) applied to the actual disk capacities.

- Create a local admin account (for troubleshooting only)
Step 4: Network Configuration
- Choose an existing or new Virtual Network and Subnet
- Assign a Public IP Address (optional)
- We recommend disabling public IP and using a Bastion Host for RDP access
- See the CAEVES KB for IP allocation best practices
Step 5: Active Directory & Security
- Choose Workgroup or Domain-joined mode
- Join via:
- Traditional Active Directory
- Microsoft Entra ID Domain Services
- A system-managed identity will be created by default for Entra ID integration
Step 6: Configure CAEVES Cloud Object Storage
- Provision a CAEVES Storage Account
- Hosts all object data and associated snapshots
- Includes a Metadata Table used by:
- CAEVES Copilot Connector (for RAG search & M365 integration)
- Microsoft 365 Search indexing
Step 7: Configure Snapshots & Retention Policies
- Enable VSS (Volume Shadow Copy) by default
- Supports Previous Versions file restore
- Activate Metadata Snapshot Scheduling
- Snapshots ~10% of your data disk size to object storage
- Used for disaster recovery and instance rebuilds
- Review snapshot sizing, retention tiers, and cost estimates in the CAEVES KB
Step 8: Final Review & Deployment
-
Supply your phone number
-
Review your full deployment configuration
-
Click Create to start the provisioning process
Deployment takes ~5–10 minutes and includes:
-
CAEVES Virtual Machine
-
Cloud Object Storage & Metadata Services
-
All dependencies auto-provisioned
After Deployment
Once complete, you can:
-
Validate the instance status
-
Begin migrating legacy file data to CAEVES