
Prerequisites:
Before starting the deployment, ensure that:
- The CAEVES Intelligent Deep Storage subscription has been activated.
- The Microsoft Entra App Registration and client secret have been created.
- You have the required Azure permissions to provision storage resources and assign roles.
- You have administrative access to the Windows Server and Hyper-V.
- The Azure tenant ID, application (client) ID, and client secret are available.
Step 1: Provision Hybrid Cloud Storage in Azure
Before deploying the on-premises CAEVES instance, provision the Hybrid Cloud Storage platform in the customer's Azure tenant.
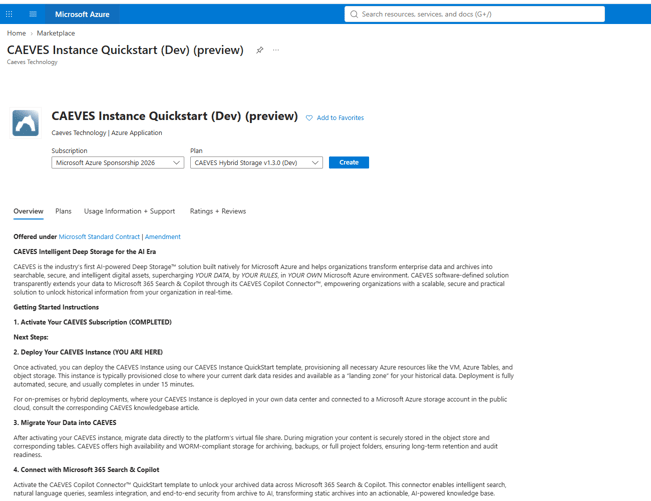
Step 1.1: Launch the QuickStart Deployment
- Sign in to the Azure Portal
- Navigate to Microsoft Marketplace - CAEVES Quickstart Application
- Select the appropriate Azure subscription, and Hybrid storage plan
- Review the Getting Started instructions
- Click Create
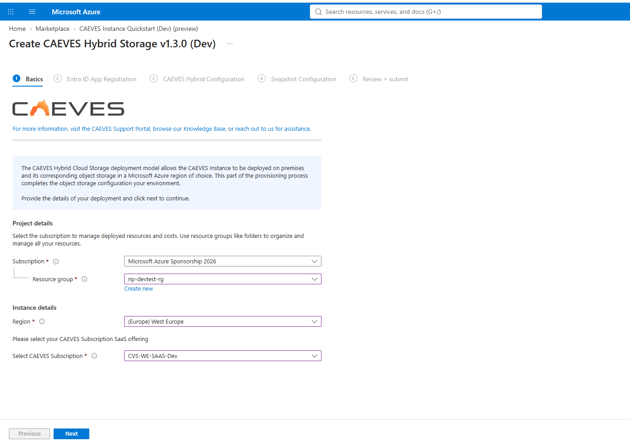
Step 1.2: Configure the Deployment Details
Select the appropriate values for the following fields:
- Azure Subscription: Select the subscription in which the Hybrid Cloud Storage resources will be deployed.
- Resource Group: Select an existing resource group or create a new one.
- Region: Select the Azure region for the deployment.
- CAEVES Subscription: Select the applicable CAEVES subscription.
Review the selected configuration before proceeding.
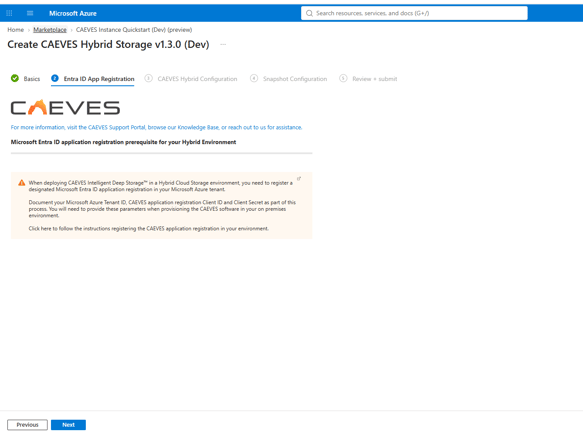
Step 1.3: Configure the Microsoft Entra ID App Registration
Ensure that a Microsoft Entra ID App Registration has been created in the customer's Azure environment.
If an App Registration has not yet been created, follow the instructions in Prerequisites for Hybrid Storage Deployment to register the CAEVES application and generate the client secret.
Keep the required application credentials available for the subsequent configuration steps.
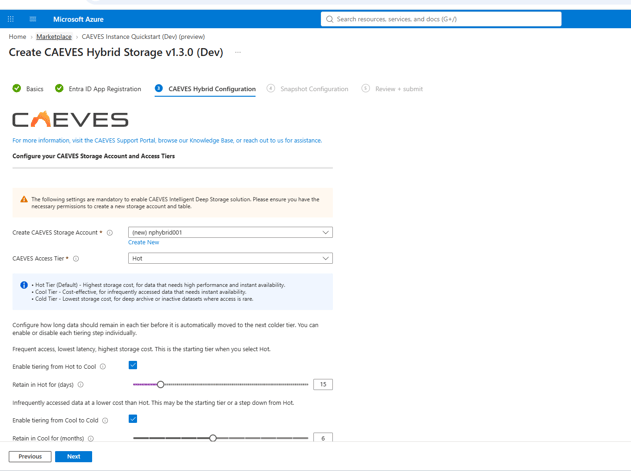
Step 1.4: Configure the CAEVES Storage Account
Configure the Azure Storage Account that will be used by the CAEVES Hybrid Cloud Storage platform.
- Select the option to create or configure the Storage Account.
- Provide the required Storage Account details.
- Configure the appropriate access tier according to the customer's storage requirements.
- Review the Storage Account configuration and confirm that the selected settings meet the deployment requirements.
- Proceed to the next step in the deployment wizard.
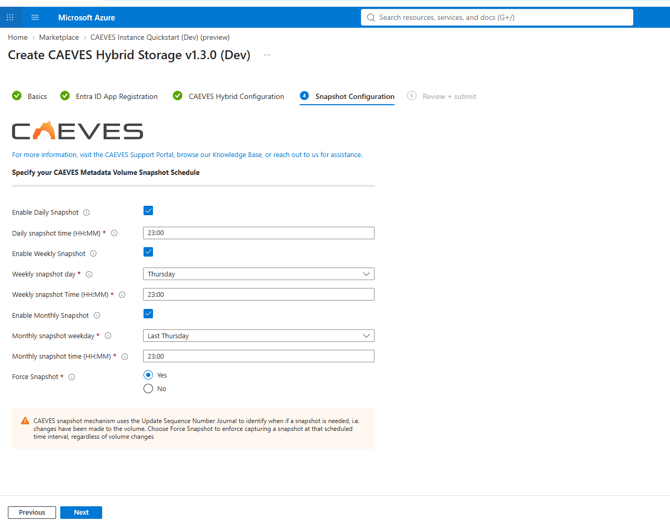
Step 1.5: Configure the Snapshot Schedule
In the Snapshot Configuration section, configure the available settings and select the required snapshot scheduling frequency.
- Daily: Run the metadata snapshot every day.
- Weekly: Run the metadata snapshot on selected days of the week.
- Monthly: Run the metadata snapshot according to the selected monthly schedule.
Force Snapshot: By default, CAEVES uses the Update Sequence Number (USN) Journal to detect volume changes and determine whether a snapshot is required. Enable Force Snapshot to capture a snapshot at every scheduled interval, regardless of whether volume changes have occurred.
Step 1.6: Review Configuration and Create
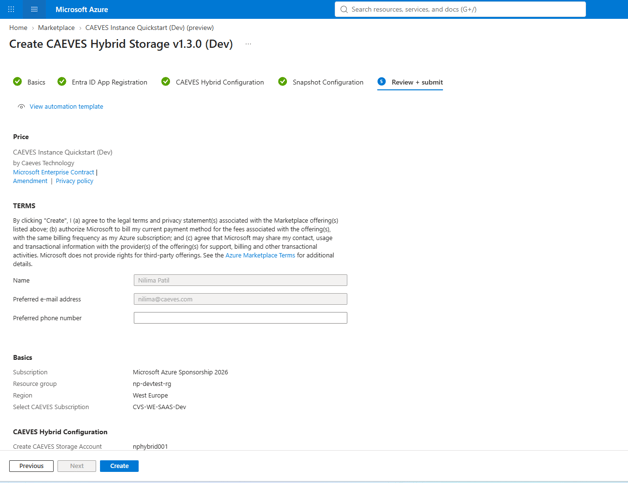
- Review all configured deployment settings, including the Azure subscription, resource group, region, CAEVES subscription, Storage Account, access tier, and snapshot schedule.
- Verify that the configuration meets the customer's requirements.
- Click Create to start the deployment.
- Wait for the deployment to complete successfully.
- Verify that the required Azure storage resources have been provisioned.
Note: The Hybrid Cloud Storage template provisions storage resources and dependencies only. It does not create virtual machines or other compute resources.
Step 2: Provision the Windows Server 2025 Virtual Machine
Create a new virtual machine using Hyper-V Manager.
Configure the virtual machine with the following settings:
- VM Type: Generation 2
- Memory: 16384 MB; disable dynamic memory
- Network: Configure the connection to the appropriate LAN virtual switch
- Hard Disk: Use the default OS disk
- Installation Option: Select the Windows Server 2025 Standard Edition installation image
- Processor: Configure 8 virtual CPUs
- After creating the virtual machine, attach two additional fixed-size data disks:
servername-data1— 127 GB
servername-data2— 127 GB - Power on the virtual machine and install Windows Server 2025 Standard Edition with Desktop Experience. Select Disk 0 for the operating system and leave the additional data disks unallocated.
Step 3: Download the Deployment Files
Download the following files from the customer's Azure Storage Account:
Setup-HybridConfiguration.ps1ConfigParameters.json
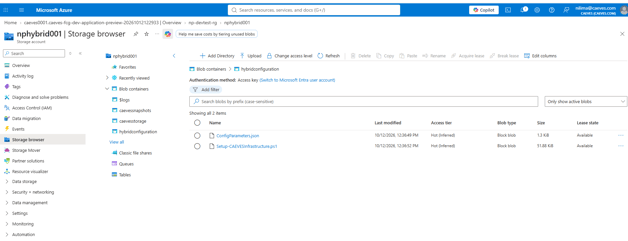
Place both files in the same folder on the Windows Server. C:\CAEVES

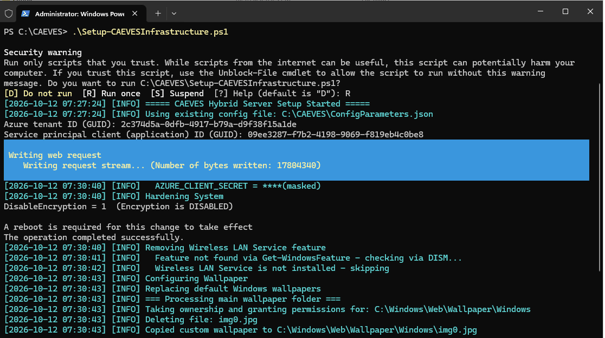
Step 4: Run Setup-HybridConfiguration.ps1
- Open PowerShell as Administrator.
- Navigate to the folder containing the deployment files: Set-Location C:\CAEVES
- Run the configuration script using the customer's Azure service principal credentials:
.\Setup-HybridConfiguration.ps1 -TenantId <tenant-guid> -ClientId <client-guid> -ClientSecret (Read-Host -AsSecureString) - Replace the placeholder values with the customer's actual tenant ID and application (client) ID. When prompted, enter the client secret.
|
Parameter |
Description |
| -TenantId | Azure tenant ID. Must be a valid GUID. |
| -ClientId | Service principal application (client) ID. Must be a valid GUID. |
| -ClientSecret | Service principal client secret, as a SecureString. If omitted, the script prompts with masked input. |
| -ConfigureOnly |
Optional. Skips the prerequisites and runs only the CAEVES configuration. Use it to resume a run that stopped after the prerequisites finished. SPN details already saved on the server are reused, so there are no prompts. |
What the Script Does
The script performs the following operations in sequence.
1. Validate inputs and prepare folders
- Creates the required
C:\CAEVESfolders. - Checks for
ConfigParameters.json. - Collects any missing SPN credentials before starting lengthy installation tasks.
- Saves the SPN details as machine-level environment variables:
AZURE_TENANT_IDAZURE_CLIENT_IDAZURE_CLIENT_SECRET
The script does not explicitly print or log the client secret.
2. Install prerequisites
- Applies the required system hardening and CAEVES wallpaper.
- Removes the Wireless LAN Service feature.
- Installs the required .NET, PowerShell 7, and Visual C++ dependencies.
- Installs the CAEVES FCG software.
- Installs Windows updates.
- Creates desktop shortcuts.
If the FCG installer reports a failure, the script stops.
3. Configure CAEVES
- Continues the configuration phase in PowerShell 7 when necessary.
- Partitions the data disks, unless the Metadata and Cache volumes already exist.
- Applies the FCG Agent settings from
ConfigParameters.json. - Configures VSS shadow storage.
- Creates the configured snapshot schedules.
If the installed CAEVES PowerShell module does not support the queueName setting, the script logs a warning and continues.
Configuration File Location
The script looks for the configuration file at:
C:\CAEVES\ConfigParameters.json
If the file does not exist there, the script copies it from the folder containing the script.
If the file cannot be found in either location, the script stops before installing anything.
Step 5: Reboot and Validate the Deployment
A reboot is required after the script completes.
The prerequisite installation changes system settings that require a restart to take effect. The script does not restart the server automatically.
Restart Windows Server after the script finishes successfully.
Validate the Deployment
After restarting the server, verify that CAEVES has been configured correctly.
Validate Storage Volumes
| Volume | Purpose |
|---|---|
| F: | Metadata |
| G: | Cache |
| No drive letter | VSS shadow storage for Snapshots |
The Snapshots and Metadata volumes reside on the first data disk, while Cache resides on the second data disk.
Validate CAEVES Services
- Confirm that the FCG Agent is configured and running.
- Verify that the CAEVES services start successfully.
- Confirm that the configuration values have been applied.
- Verify that VSS shadow storage is configured.
- Confirm that the required daily, weekly, and monthly snapshot schedules have been created.
Review Deployment Logs
Review the deployment log at:
C:\CAEVES\Logs\OnPrem-Deployment.log
Check for errors, warnings, and confirmation that the configuration completed successfully.

Re-running the Script
If C:\CAEVES\boot.complete exists, the script exits with code 4 and makes no further changes.
Do not delete this marker unless you intentionally want to reconfigure the same server and have confirmed that doing so is appropriate.
Deployment Complete
The deployment is complete when:
- Windows Server 2025 is installed and configured.
- The deployment script has completed successfully and the server has been restarted.
- The Metadata, Cache, and Snapshots volumes are configured correctly.
- The FCG Agent and CAEVES services are operational.
- The required snapshot schedules have been created.
- The instance can access the configured Azure Storage Account and its dependencies.
- Deployment logs have been reviewed and sensitive credentials are appropriately protected.
The CAEVES hybrid instance is now ready for operational validation and customer-specific configuration.